Celebrating Global Money Week with Toys and Games!
- Sophie Hibberd Posted On Mar 25, 2019 | National Holidays
FREE DELIVERY on all UK online orders over £50!FREE DELIVERY on all UK online orders over £50!
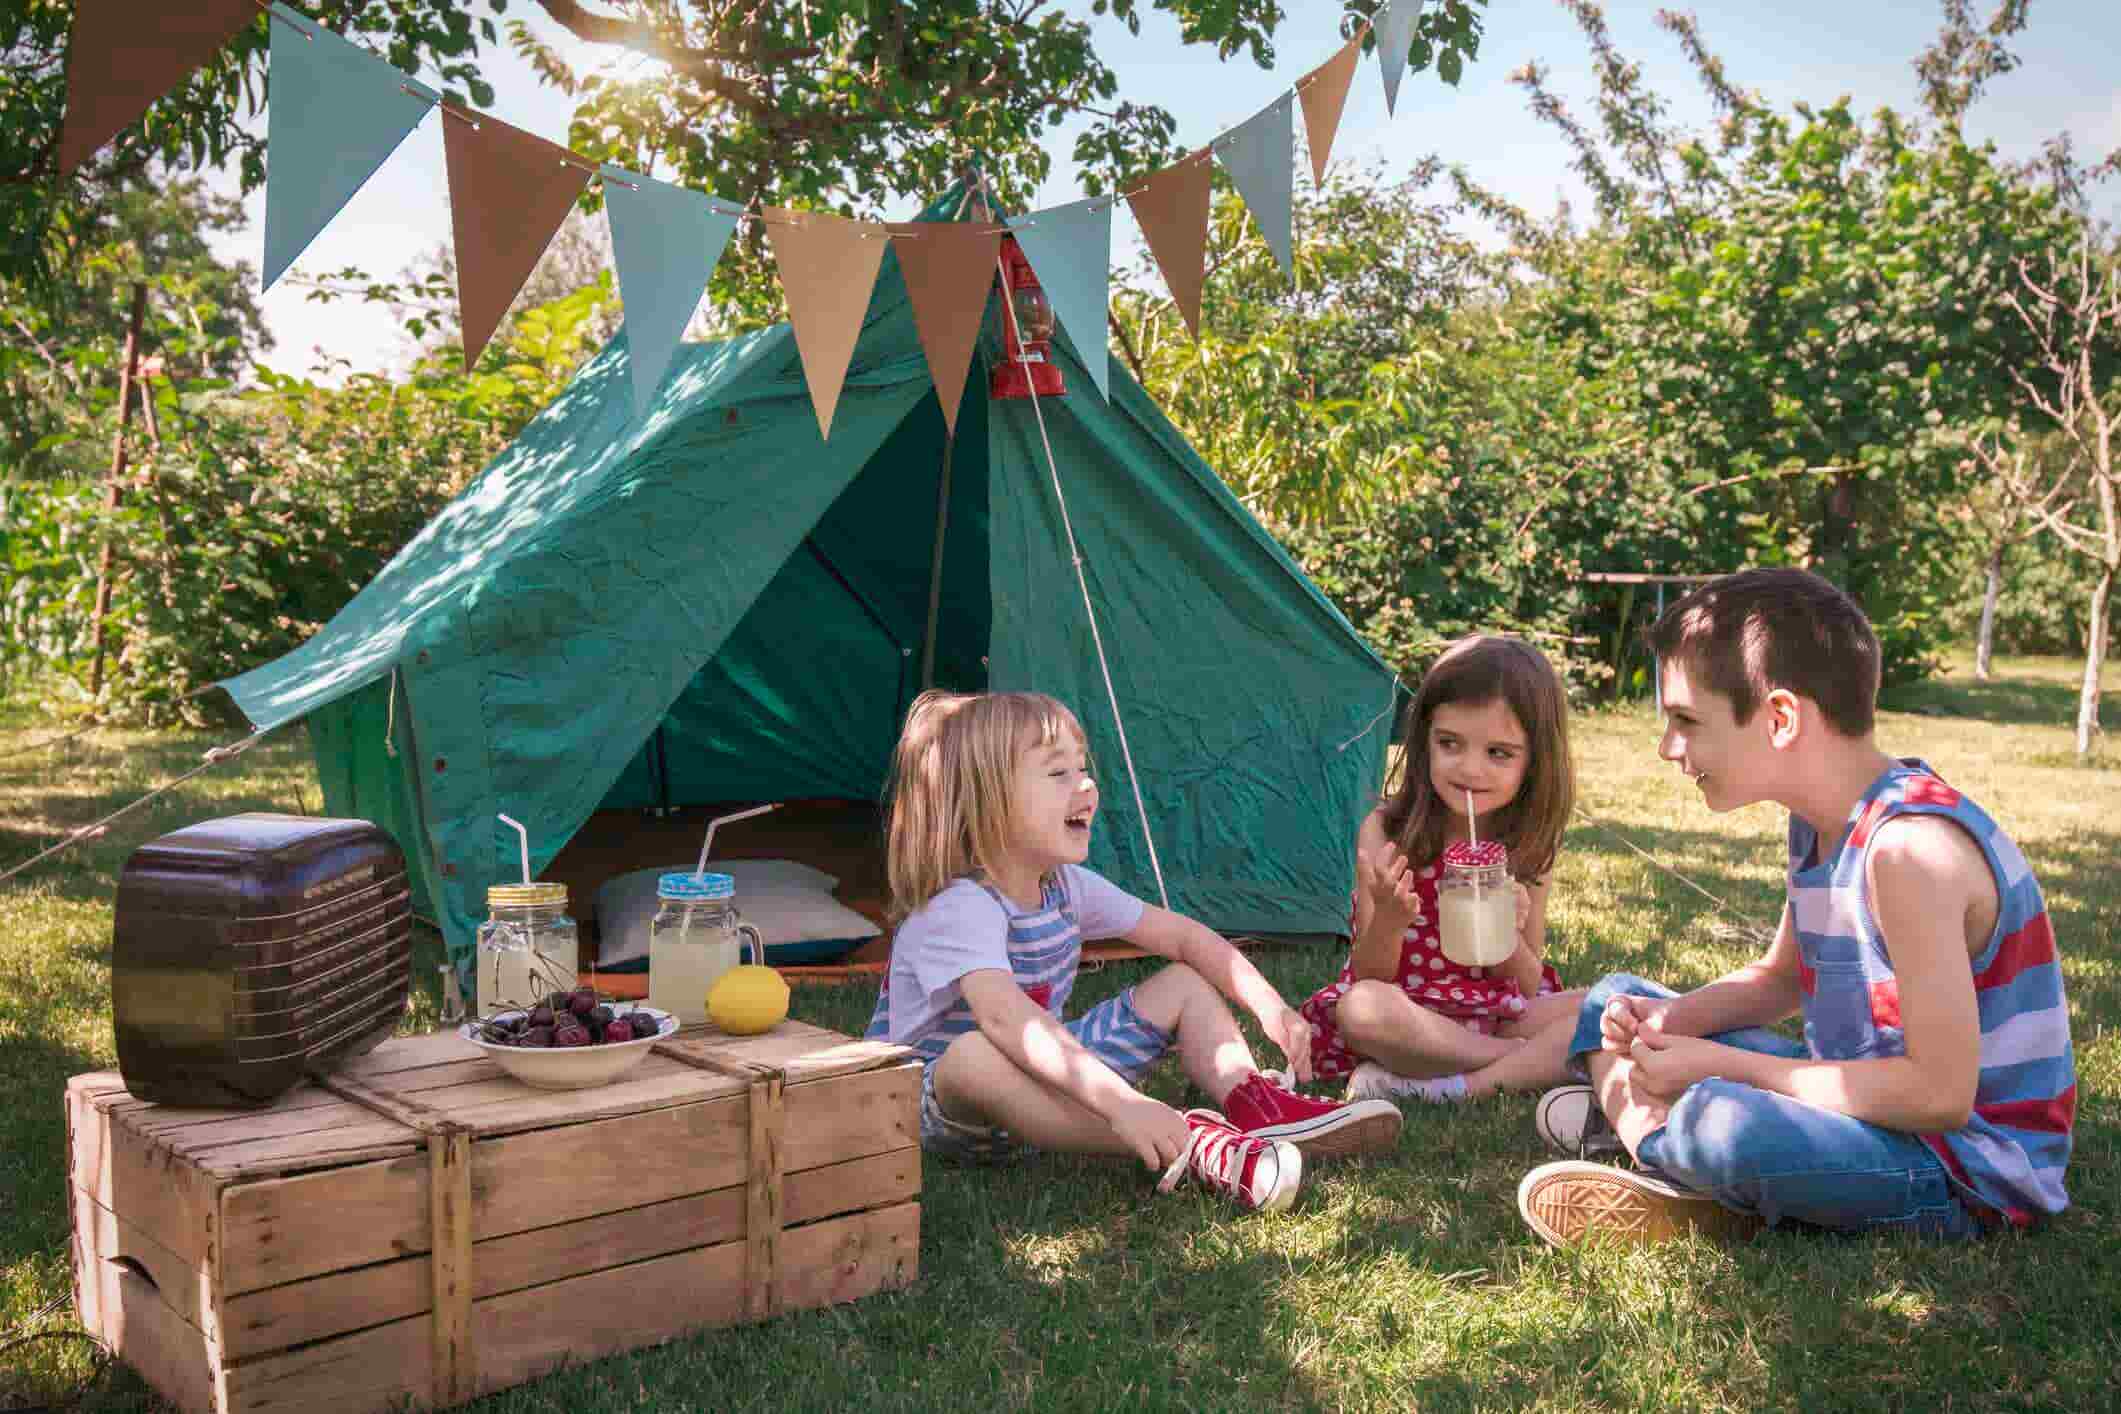
There's lots of fun things to do in the holidays at home. It's time to ignore the chores for a while, kick back and make the most of the long sunny days, warm weather, and blue skies.
Emma is a busy mum to three even busier children. She is passionate about the importance of science education and making science fun for kids. You can find Emma’s science-based activities and investigations over on Science Sparks, a website bursting with creative and engaging ideas for children of all ages.
Emma has pulled together some fun science experiments that you can do at home to celebrate British Science Week.
I’ve spoken to many parents over the years who find the prospectof science at home to be a little daunting; they worry it’ll be messy, not workor be hard to explain. There’s no doubt that sometimes it can be a little messyand it doesn’t always work, but part of the fun for me is working together withmy children to find out why something didn’t work or how we can improve it.
As this week is British Science Week there’s no better time tohave a go at some science at home. You’ll probably be surprised at how everydaykitchen items can be used for a fun investigation that’ll have both you and thekids asking questions and wanting to try more!

A lava lampis almost mess free and especially good as it can be used over and over again.
Materials
Tall jar orbottle
Vegetable oil
Water
Foodcolouring
Effervescentvitamin tablet
Instructions
Fill the jar or bottle about one quarter full with water.
Fill to almost the top with vegetable oil.
The oil and water will separate into two layers with water atthe bottom and oil at the top. If you shake the bottle to mix them up, theywill separate out again!
Once the oil and water have separated, use a pipette to drop foodcolouring into the oil. This will drop through into the water, which is greatfun to watch.
Drop half an effervescent vitamin tablet into the lava lamp andwatch the bubbles!
Once the bubblesstop add another half tablet to make the lava lamp fizz again.
Whydoes this work?
Theeffervescent vitamin tablet reacts with the water to produce carbon dioxidegas. The bubblesof carbon dioxide carry the coloured water into the oil giving a lavalamp effect.

This activity encourages children to think about why some objectsfloat in water and some sink.
Materials
A selection of different balls – one should sink
Bubble wrap
Tape
A container filled with water
Instructions
Ask the children to sort the balls into those they think will sinkand those they think will float.
Test the balls one at a time.
Take a ball, which sank and wrap in bubble wrap secured with tape.
Test the bubble wrap ball again. It should float! If it doesn’tfloat add more bubble wrap until it does.
Whydoes this work?
Although the bubble wrap makes the ballweigh a little more, it also displaces extra water making the ball more buoyant.The pockets of air in the bubble wrap mean that the ball and bubble wraptogether are less dense than the water, which means the ball floats!
This is agreat activity for thinking about how things change over time and fantastic funas it includes chocolate.
Materials
White, darkand milk chocolate buttons
Timer
Pen and paper
Instructions
Place a whitechocolate button in the centre of the experimenter’s hand and start the timer.
Stop thetimer when all the chocolate has melted and record the time.
Repeat with amilk and dark chocolate button.
Try again,but this time the experimenter should close their hand and then try with the chocolatebuttons resting on top of the hand.
Where do theymelt the fastest? Why do you think that is?
Would a sugar-coatedchocolate like an M and M melt faster or more slowly?
If you likethe sound of the ideas above don’t forget to check out ScienceSparks for moresimple and fun science ideas for kids.
Emma is a busy mum to three even busier children. She is passionate about the importance of science education and making science fun for kids. You can find Emma’s science-based activities and investigations over on Science Sparks, a website bursting with creative and engaging ideas for children of all ages.
Emma has pulled together some fun science experiments that you can do at home to celebrate British Science Week.
I’ve spoken to many parents over the years who find the prospectof science at home to be a little daunting; they worry it’ll be messy, not workor be hard to explain. There’s no doubt that sometimes it can be a little messyand it doesn’t always work, but part of the fun for me is working together withmy children to find out why something didn’t work or how we can improve it.
As this week is British Science Week there’s no better time tohave a go at some science at home. You’ll probably be surprised at how everydaykitchen items can be used for a fun investigation that’ll have both you and thekids asking questions and wanting to try more!
A lava lampis almost mess free and especially good as it can be used over and over again.
Materials
Tall jar orbottle
Vegetable oil
Water
Foodcolouring
Effervescentvitamin tablet
Instructions
Fill the jar or bottle about one quarter full with water.
Fill to almost the top with vegetable oil.
The oil and water will separate into two layers with water atthe bottom and oil at the top. If you shake the bottle to mix them up, theywill separate out again!
Once the oil and water have separated, use a pipette to drop foodcolouring into the oil. This will drop through into the water, which is greatfun to watch.
Drop half an effervescent vitamin tablet into the lava lamp andwatch the bubbles!
Once the bubblesstop add another half tablet to make the lava lamp fizz again.
Whydoes this work?
Theeffervescent vitamin tablet reacts with the water to produce carbon dioxidegas. The bubblesof carbon dioxide carry the coloured water into the oil giving a lavalamp effect.
This activity encourages children to think about why some objectsfloat in water and some sink.
Materials
A selection of different balls – one should sink
Bubble wrap
Tape
A container filled with water
Instructions
Ask the children to sort the balls into those they think will sinkand those they think will float.
Test the balls one at a time.
Take a ball, which sank and wrap in bubble wrap secured with tape.
Test the bubble wrap ball again. It should float! If it doesn’tfloat add more bubble wrap until it does.
Whydoes this work?
Although the bubble wrap makes the ballweigh a little more, it also displaces extra water making the ball more buoyant.The pockets of air in the bubble wrap mean that the ball and bubble wraptogether are less dense than the water, which means the ball floats!
This is agreat activity for thinking about how things change over time and fantastic funas it includes chocolate.
Materials
White, darkand milk chocolate buttons
Timer
Pen and paper
Instructions
Place a whitechocolate button in the centre of the experimenter’s hand and start the timer.
Stop thetimer when all the chocolate has melted and record the time.
Repeat with amilk and dark chocolate button.
Try again,but this time the experimenter should close their hand and then try with the chocolatebuttons resting on top of the hand.
Where do theymelt the fastest? Why do you think that is?
Would a sugar-coatedchocolate like an M and M melt faster or more slowly?
If you likethe sound of the ideas above don’t forget to check out ScienceSparks for moresimple and fun science ideas for kids.

The periodic table is one of the most significantachievements in science which captures the essence of chemistry, physics andbiology. On the 20th of December 2017, the United Nations GeneralAssembly proclaimed that 2019 will be the 150th anniversary of the periodictable and has therefore been named the ‘International Year of the PeriodicTable of Chemical Elements’ (IYPT).
IYPT is a celebration of scientists, their members and theircommunities. It’s a way of working with their communities to engage people inthe Royal Society of Chemistry (RSC) and the periodic table. The RSC areholding activities throughout 2019, including public lectures, teacherresources, public outreach, themed journals and books, and grants to fund IYPTactivities and communities.

‘IYPT is anopportunity for us to develop new resources and raise awareness, to inspirepeople of all ages, experience and backgrounds. The Periodic Table of Elementsis a great teaching tool and probably the most recognisable thing in chemistry.’– The Royal Society of Chemistry.
What is thePeriodic Table?
The periodic table is a table of the chemical elements thathave been arranged in order of atomic number, usually in rows, so that elementswith similar atomic structure appear in vertical columns. The periodic table isused as a tool for scientists to understand and predict the properties of allthe elements.

In 1869, Russian scientist Dmitri Mendeleev discovered theperiodic table of elements. At the time, only 63 of the 118 elements had beendiscovered, Mendeleev acknowledged this and left gaps in the table for elementsyet to be discovered.
The elements discovered in the following years confirmedMendeleev’s predictions of the undiscovered elements, revealing the brillianceof the periodic table. 55 elements have been discovered since his discovery,and all were added to the table according to their atomic mass. Mendeleevforesaw properties of some of these elements when attempting to order them, whichexplains why the Periodic Table was so successful and is still used today.
Element 101 was named mendelevium to honour Mendeleev’scontributions to science and the Periodic Table. This is a rare distinction,only 50 scientists have elements named after them.

The History of thePeriodic Table of Chemical Elements
1669 – Germanamateur alchemist Hennig Brand created an object called the ‘Philosopher’sStone’ that supposedly could turn metals into pure gold. Whilst heatingresidues of urine, some liquid dropped out and burst into flames. This was thefirst discovery of phosphorus.
1680 – Phosphorusbecame public after Robert Boyle also discovered it.
1809 – at least47 elements were discovered, and scientists began to see patterns in thecharacteristics.
1863 – EnglishChemist John Newlands divided the 56 discovered elements into 11 groups basedon these characteristics.
1869 – DimitriMendeleev, developed the periodic table.
1886– French physicist Antoine Bequerel first discoveredradioactivity.
- Ernest Rutherford named three types of radiation: alpha, beta and gammarays.
- Marie and Pierre Curie started working on theradiation of uranium and thorium and later discoveredradium and polonium. They also discovered that beta particles were negativelycharged.
1894 – Sir William Ramsay and Lord Rayleigh discoverednoble gases, known on the periodic table as group 0.
1897 – Electrons (small negatively charged particles inan atom) were first discovered by physicist J. J. Thomson.
- John Townsend and Robert Millikan determined their exact charge andmass.
1900 - Bequerel discovered that electrons and betaparticles as identified by the Curies are the same thing.
1903 – Rutherford announced thatradioactivity is caused by the breakdown of atoms.
1911 - Rutherford and German physicist Hans Geiger discovered that electrons orbit the nucleus of an atom.
1913 – It was discovered by Bohr that electrons move around a nucleus in discrete energy called orbitals. Radiation is emitted during movement from one orbital to another.
1914 - Rutherford first identified protons inthe atomic nucleus. He also transmutated a nitrogen atom into an oxygen atomfor the first time.
- English physicist Henry Moseley provided atomic numbers, based on thenumber of electrons in an atom, rather than based on atomic mass.
1932 – Neutrons and isotopes were firstidentified by James Chadwick, completing the basis for the periodic table.
- Cockroft and Walton first split anatom and changed it to two helium nuclei by bombarding lithium in a particleaccelerator.
1945 - Glenn Seaborg identifiedlanthanides and actinides, which are usually placed below the periodic table.
In 2016, there were four undiscovered elements according tothe gaps in the periodic table. The addition of nihonium, moscovium, tennessineand oganesson has classed the table as complete… for now!
Fun Facts aboutthe Elements
If you want to learn more about the periodic table, take alook at the Periodic Table Song!
The periodic table is one of the most significantachievements in science which captures the essence of chemistry, physics andbiology. On the 20th of December 2017, the United Nations GeneralAssembly proclaimed that 2019 will be the 150th anniversary of the periodictable and has therefore been named the ‘International Year of the PeriodicTable of Chemical Elements’ (IYPT).
IYPT is a celebration of scientists, their members and theircommunities. It’s a way of working with their communities to engage people inthe Royal Society of Chemistry (RSC) and the periodic table. The RSC areholding activities throughout 2019, including public lectures, teacherresources, public outreach, themed journals and books, and grants to fund IYPTactivities and communities.
‘IYPT is anopportunity for us to develop new resources and raise awareness, to inspirepeople of all ages, experience and backgrounds. The Periodic Table of Elementsis a great teaching tool and probably the most recognisable thing in chemistry.’– The Royal Society of Chemistry.
What is thePeriodic Table?
The periodic table is a table of the chemical elements thathave been arranged in order of atomic number, usually in rows, so that elementswith similar atomic structure appear in vertical columns. The periodic table isused as a tool for scientists to understand and predict the properties of allthe elements.
In 1869, Russian scientist Dmitri Mendeleev discovered theperiodic table of elements. At the time, only 63 of the 118 elements had beendiscovered, Mendeleev acknowledged this and left gaps in the table for elementsyet to be discovered.
The elements discovered in the following years confirmedMendeleev’s predictions of the undiscovered elements, revealing the brillianceof the periodic table. 55 elements have been discovered since his discovery,and all were added to the table according to their atomic mass. Mendeleevforesaw properties of some of these elements when attempting to order them, whichexplains why the Periodic Table was so successful and is still used today.
Element 101 was named mendelevium to honour Mendeleev’scontributions to science and the Periodic Table. This is a rare distinction,only 50 scientists have elements named after them.
The History of thePeriodic Table of Chemical Elements
1669 – Germanamateur alchemist Hennig Brand created an object called the ‘Philosopher’sStone’ that supposedly could turn metals into pure gold. Whilst heatingresidues of urine, some liquid dropped out and burst into flames. This was thefirst discovery of phosphorus.
1680 – Phosphorusbecame public after Robert Boyle also discovered it.
1809 – at least47 elements were discovered, and scientists began to see patterns in thecharacteristics.
1863 – EnglishChemist John Newlands divided the 56 discovered elements into 11 groups basedon these characteristics.
1869 – DimitriMendeleev, developed the periodic table.
1886– French physicist Antoine Bequerel first discoveredradioactivity.
- Ernest Rutherford named three types of radiation: alpha, beta and gammarays.
- Marie and Pierre Curie started working on theradiation of uranium and thorium and later discoveredradium and polonium. They also discovered that beta particles were negativelycharged.
1894 – Sir William Ramsay and Lord Rayleigh discoverednoble gases, known on the periodic table as group 0.
1897 – Electrons (small negatively charged particles inan atom) were first discovered by physicist J. J. Thomson.
- John Townsend and Robert Millikan determined their exact charge andmass.
1900 - Bequerel discovered that electrons and betaparticles as identified by the Curies are the same thing.
1903 – Rutherford announced thatradioactivity is caused by the breakdown of atoms.
1911 - Rutherford and German physicist Hans Geiger discovered that electrons orbit the nucleus of an atom.
1913 – It was discovered by Bohr that electrons move around a nucleus in discrete energy called orbitals. Radiation is emitted during movement from one orbital to another.
1914 - Rutherford first identified protons inthe atomic nucleus. He also transmutated a nitrogen atom into an oxygen atomfor the first time.
- English physicist Henry Moseley provided atomic numbers, based on thenumber of electrons in an atom, rather than based on atomic mass.
1932 – Neutrons and isotopes were firstidentified by James Chadwick, completing the basis for the periodic table.
- Cockroft and Walton first split anatom and changed it to two helium nuclei by bombarding lithium in a particleaccelerator.
1945 - Glenn Seaborg identifiedlanthanides and actinides, which are usually placed below the periodic table.
In 2016, there were four undiscovered elements according tothe gaps in the periodic table. The addition of nihonium, moscovium, tennessineand oganesson has classed the table as complete… for now!
Fun Facts aboutthe Elements
If you want to learn more about the periodic table, take alook at the Periodic Table Song!


 Bright Basics™ Slide & Splash SpoutsThe first bath toy I’m going to share with you is the Bright Basics™ Slide & Splash Spouts toy. This toy is suitable for ages 2 - 5 and I personally love that it's a toy that can grow with your child and that can be played with in so many different ways as they get older. The Bright Basics™ Slide & Splash Spouts come with:
 Build It!The Bright Basics™ Slide and Splash Spouts comes with three colourful pipes, two of which are different sizes. Each of the pipes come with suction cups so that you can stick them to the bath. This makes it super easy for kids to slide the pieces around, so that they can build themselves a route.Evie loved becoming a little engineer and had lots of fun designing different routes with the pipes. The idea is to set up a route that allows the 'Itsy Bitsy' spider ball to run through the pipes and the spinning faucet, all the way to the end. You can encourage its movement by pouring water through the pipes using the sun cup.I really enjoyed watching Evie experiment, make predictions and learn all about trial and error with this toy. Just by playing with this toy she’s already building on her early maths and science skills without even realising it!The first time we played with it, we planned and designed a route together. We planned where each pipe would go and then we watched which way the water flowed to try to work out how to get the ball through all of the pipes and if we needed to make changes. Evie found it so tricky at first but seeing her think, experiment and put together the puzzle was a lot of fun to see. This was also amazing for encouraging discussion, developing fine motor skills and for recognising cause and effect. After the first go, Evie wanted to try building several different routes by herself and she did so well.Sense It!Another fun way you can play with this is toy is by playing a ‘Sense It’ game. This particular game is great for very younger kids as you can use the sprinkler cup to pour the water onto your child's hands. They can then try and catch the water. As Evie is older we used both a pipe and the sprinkler cup to pour water onto her hands. I then asked Evie to talk about the differences in feeling, which encouraged a lot of discussion. I also loved using the sprinkler cup to talk to Evie about rain and how the water collects in clouds and then sprinkles down on us. She then used this idea to make it rain down the pipes on the spider ball.Sing It!This encouraged another way to play with the Bright Basics™ Slide & Splash Spouts toy; singing. This is also a game that is encouraged in the toys main activity guide.The Itsy Bitsy Spider ball that comes with the Bright Basics™ Slide & Splash Spouts toy, has been cleverly named after the famous nursery rhyme. During one of our play sessions I started singing the nursery rhyme and as I did I tried to push the ball back up one of the spouts.Evie grinned and instantly took over and role played the song with the Itsy Bitsy Spider ball. She made him climb up the pipe and then when he reached the top, she filled the rain cloud with water. She then used the rain cloud to pour water down the pipes so that it would push the 'Itsy Bitsy' spider ball back out again. Then she picked up the sun cup to 'dry up all the rain' and pushed the spider ball all the way back up to the top again.For smaller children, singing the nursery rhyme will help to encourage their listening skills and language development. It's also such a fun way of learning with this toy.Once you've finished play time, the Bright Basics™ Slide & Splash Spouts can be tidied away into a mesh bag which comes in to the box. This can then be hung to dry when it's not in use.
  Bright Basics™ Bath BlocksThe second bath toy I’m going to share with you is the Bright Basics™ Bath Blocks. These are also suitable for ages 2 - 5 and again there are so many learning points for little minds. The Bright Basics™ Bath Blocks come with:
 Build It!The Bright Basics™ Bath Blocks comes with a large floating base and lots of bricks and accessories that can be stacked and built on top the floating the base. The idea is to make a giant floating sandcastle.For early learners and younger children, they can start off playing with this through balancing and stacking. Why not build a huge tower with the bricks so that your child can see what happens? Then you can knock it down so that your child learns cause and effect, before you build it back up again. This will help them to develop sensory awareness and fine motor skills as they try and balance the blocks on top of one another.As Evie is a little bit older, for her it was all about working out where the different parts could go, so that she could complete the sandcastle.
 Imaginative Play!The bath blocks also come with four sea creatures; a seal, a whale, a dolphin and a turtle. As soon as Evie finished building the castle, the imaginative play began and for the past few bath sessions Evie has been turning the castle into a home for the four sea creatures, who she makes interact with each other. I also used this toy to introduce Evie to a new nursery rhyme that we haven’t sung to her before.Sing It!One thing I love, is that Bright Basics™ team include an activity guide in each toy pack, so that you get inspiration of things you can do with your child. One thing they encourage with each toy is learning through singing.Singing helps with listening skills and the repetition in songs such as 'nursery rhymes', really helps to support early language development. The song they recommend singing for this toy is the “She Sells Seashells by the Seashore” nursery rhyme. After I sang this song to Evie, she was inspired to turn the castle into a ‘shell shop’, where the creatures would come in to buy shells from the turtle who was chief shell collector. She would re-sing the song as each animal swam around the bath and up to the front door of the castle.
  Bright Basics™ 123 TubbiesThe final toy we were sent to review is called the Bright Basics™ 123 Tubbies. This bath toy is suitable for ages 3 - 5 and is a great bath toy for introducing shapes and numbers to small children. The Bright Basics™ 123 Tubbies comes with 26 individual puzzles.
 Build it!The second way you can play with this toy is by building with it. Using the shape pieces and the construction pieces, your child can you put together a building on your bathtub wall. This gave me the opportunity to discuss shapes a lot more with Evie as she built different structures on our the wall of our bath.Every time she picked up a piece to add to her building, I asked her to tell me what makes each shape unique. For example; a square has four sides the same. I then encouraged her to discuss the difference between a square and rectangle. I loved hearing her thoughts on this.If your child is a bit younger than Evie though, they can simply play with this toy by building different structures, which will help them to develop fine motor skills. You can then use this opportunity to help you to teach your child the name of shapes and to encourage shape recognition.Sing It!The final way we loved playing with this toy is by singing yet another new nursery rhyme. Singing is particularly good, especially for younger kids. This time the Bright Basics™ team encourage you to sing the 'One, Two, Buckle My Shoe' song. Singing this song helps to reinforce patterns and number recognition and generally makes play time with this bath toy a lot more fun.
 Our ThoughtsThank you so much to Learning Resources for sending us these three bath toys to review. My favourite thing about all three of these toys is that they all combine both learning and bath time fun. Evie didn’t feel like she was in a strict learning environment, yet at the same time, each time she plays with even one of these toys, she is learning life skills and is being encouraged to hit new milestones, which is fantastic preparation for school and beyond.We can't even pick a favourite out of all three of these bath time toys. All three of them are so unique, fun and educational and we will definitely be continuing to have fun with them over the next year and beyond.To hear more from Life Unexpected, go to www.lifeunexpected.co.uk
Bright Basics™ Slide & Splash SpoutsThe first bath toy I’m going to share with you is the Bright Basics™ Slide & Splash Spouts toy. This toy is suitable for ages 2 - 5 and I personally love that it's a toy that can grow with your child and that can be played with in so many different ways as they get older. The Bright Basics™ Slide & Splash Spouts come with:Build It!The Bright Basics™ Slide and Splash Spouts comes with three colourful pipes, two of which are different sizes. Each of the pipes come with suction cups so that you can stick them to the bath. This makes it super easy for kids to slide the pieces around, so that they can build themselves a route.Evie loved becoming a little engineer and had lots of fun designing different routes with the pipes. The idea is to set up a route that allows the 'Itsy Bitsy' spider ball to run through the pipes and the spinning faucet, all the way to the end. You can encourage its movement by pouring water through the pipes using the sun cup.I really enjoyed watching Evie experiment, make predictions and learn all about trial and error with this toy. Just by playing with this toy she’s already building on her early maths and science skills without even realising it!The first time we played with it, we planned and designed a route together. We planned where each pipe would go and then we watched which way the water flowed to try to work out how to get the ball through all of the pipes and if we needed to make changes. Evie found it so tricky at first but seeing her think, experiment and put together the puzzle was a lot of fun to see. This was also amazing for encouraging discussion, developing fine motor skills and for recognising cause and effect. After the first go, Evie wanted to try building several different routes by herself and she did so well.Sense It!Another fun way you can play with this is toy is by playing a ‘Sense It’ game. This particular game is great for very younger kids as you can use the sprinkler cup to pour the water onto your child's hands. They can then try and catch the water. As Evie is older we used both a pipe and the sprinkler cup to pour water onto her hands. I then asked Evie to talk about the differences in feeling, which encouraged a lot of discussion. I also loved using the sprinkler cup to talk to Evie about rain and how the water collects in clouds and then sprinkles down on us. She then used this idea to make it rain down the pipes on the spider ball.Sing It!This encouraged another way to play with the Bright Basics™ Slide & Splash Spouts toy; singing. This is also a game that is encouraged in the toys main activity guide.The Itsy Bitsy Spider ball that comes with the Bright Basics™ Slide & Splash Spouts toy, has been cleverly named after the famous nursery rhyme. During one of our play sessions I started singing the nursery rhyme and as I did I tried to push the ball back up one of the spouts.Evie grinned and instantly took over and role played the song with the Itsy Bitsy Spider ball. She made him climb up the pipe and then when he reached the top, she filled the rain cloud with water. She then used the rain cloud to pour water down the pipes so that it would push the 'Itsy Bitsy' spider ball back out again. Then she picked up the sun cup to 'dry up all the rain' and pushed the spider ball all the way back up to the top again.For smaller children, singing the nursery rhyme will help to encourage their listening skills and language development. It's also such a fun way of learning with this toy.Once you've finished play time, the Bright Basics™ Slide & Splash Spouts can be tidied away into a mesh bag which comes in to the box. This can then be hung to dry when it's not in use. Bright Basics™ Bath BlocksThe second bath toy I’m going to share with you is the Bright Basics™ Bath Blocks. These are also suitable for ages 2 - 5 and again there are so many learning points for little minds. The Bright Basics™ Bath Blocks come with:Build It!The Bright Basics™ Bath Blocks comes with a large floating base and lots of bricks and accessories that can be stacked and built on top the floating the base. The idea is to make a giant floating sandcastle.For early learners and younger children, they can start off playing with this through balancing and stacking. Why not build a huge tower with the bricks so that your child can see what happens? Then you can knock it down so that your child learns cause and effect, before you build it back up again. This will help them to develop sensory awareness and fine motor skills as they try and balance the blocks on top of one another.As Evie is a little bit older, for her it was all about working out where the different parts could go, so that she could complete the sandcastle.Imaginative Play!The bath blocks also come with four sea creatures; a seal, a whale, a dolphin and a turtle. As soon as Evie finished building the castle, the imaginative play began and for the past few bath sessions Evie has been turning the castle into a home for the four sea creatures, who she makes interact with each other. I also used this toy to introduce Evie to a new nursery rhyme that we haven’t sung to her before.Sing It!One thing I love, is that Bright Basics™ team include an activity guide in each toy pack, so that you get inspiration of things you can do with your child. One thing they encourage with each toy is learning through singing.Singing helps with listening skills and the repetition in songs such as 'nursery rhymes', really helps to support early language development. The song they recommend singing for this toy is the “She Sells Seashells by the Seashore” nursery rhyme. After I sang this song to Evie, she was inspired to turn the castle into a ‘shell shop’, where the creatures would come in to buy shells from the turtle who was chief shell collector. She would re-sing the song as each animal swam around the bath and up to the front door of the castle. Bright Basics™ 123 TubbiesThe final toy we were sent to review is called the Bright Basics™ 123 Tubbies. This bath toy is suitable for ages 3 - 5 and is a great bath toy for introducing shapes and numbers to small children. The Bright Basics™ 123 Tubbies comes with 26 individual puzzles.Build it!The second way you can play with this toy is by building with it. Using the shape pieces and the construction pieces, your child can you put together a building on your bathtub wall. This gave me the opportunity to discuss shapes a lot more with Evie as she built different structures on our the wall of our bath.Every time she picked up a piece to add to her building, I asked her to tell me what makes each shape unique. For example; a square has four sides the same. I then encouraged her to discuss the difference between a square and rectangle. I loved hearing her thoughts on this.If your child is a bit younger than Evie though, they can simply play with this toy by building different structures, which will help them to develop fine motor skills. You can then use this opportunity to help you to teach your child the name of shapes and to encourage shape recognition.Sing It!The final way we loved playing with this toy is by singing yet another new nursery rhyme. Singing is particularly good, especially for younger kids. This time the Bright Basics™ team encourage you to sing the 'One, Two, Buckle My Shoe' song. Singing this song helps to reinforce patterns and number recognition and generally makes play time with this bath toy a lot more fun. Our ThoughtsThank you so much to Learning Resources for sending us these three bath toys to review. My favourite thing about all three of these toys is that they all combine both learning and bath time fun. Evie didn’t feel like she was in a strict learning environment, yet at the same time, each time she plays with even one of these toys, she is learning life skills and is being encouraged to hit new milestones, which is fantastic preparation for school and beyond.We can't even pick a favourite out of all three of these bath time toys. All three of them are so unique, fun and educational and we will definitely be continuing to have fun with them over the next year and beyond.To hear more from Life Unexpected, go to www.lifeunexpected.co.uk
READ MORE
Our ThoughtsThank you so much to Learning Resources for sending us these three bath toys to review. My favourite thing about all three of these toys is that they all combine both learning and bath time fun. Evie didn’t feel like she was in a strict learning environment, yet at the same time, each time she plays with even one of these toys, she is learning life skills and is being encouraged to hit new milestones, which is fantastic preparation for school and beyond.We can't even pick a favourite out of all three of these bath time toys. All three of them are so unique, fun and educational and we will definitely be continuing to have fun with them over the next year and beyond.To hear more from Life Unexpected, go to www.lifeunexpected.co.uk
Bright Basics™ Slide & Splash SpoutsThe first bath toy I’m going to share with you is the Bright Basics™ Slide & Splash Spouts toy. This toy is suitable for ages 2 - 5 and I personally love that it's a toy that can grow with your child and that can be played with in so many different ways as they get older. The Bright Basics™ Slide & Splash Spouts come with:Build It!The Bright Basics™ Slide and Splash Spouts comes with three colourful pipes, two of which are different sizes. Each of the pipes come with suction cups so that you can stick them to the bath. This makes it super easy for kids to slide the pieces around, so that they can build themselves a route.Evie loved becoming a little engineer and had lots of fun designing different routes with the pipes. The idea is to set up a route that allows the 'Itsy Bitsy' spider ball to run through the pipes and the spinning faucet, all the way to the end. You can encourage its movement by pouring water through the pipes using the sun cup.I really enjoyed watching Evie experiment, make predictions and learn all about trial and error with this toy. Just by playing with this toy she’s already building on her early maths and science skills without even realising it!The first time we played with it, we planned and designed a route together. We planned where each pipe would go and then we watched which way the water flowed to try to work out how to get the ball through all of the pipes and if we needed to make changes. Evie found it so tricky at first but seeing her think, experiment and put together the puzzle was a lot of fun to see. This was also amazing for encouraging discussion, developing fine motor skills and for recognising cause and effect. After the first go, Evie wanted to try building several different routes by herself and she did so well.Sense It!Another fun way you can play with this is toy is by playing a ‘Sense It’ game. This particular game is great for very younger kids as you can use the sprinkler cup to pour the water onto your child's hands. They can then try and catch the water. As Evie is older we used both a pipe and the sprinkler cup to pour water onto her hands. I then asked Evie to talk about the differences in feeling, which encouraged a lot of discussion. I also loved using the sprinkler cup to talk to Evie about rain and how the water collects in clouds and then sprinkles down on us. She then used this idea to make it rain down the pipes on the spider ball.Sing It!This encouraged another way to play with the Bright Basics™ Slide & Splash Spouts toy; singing. This is also a game that is encouraged in the toys main activity guide.The Itsy Bitsy Spider ball that comes with the Bright Basics™ Slide & Splash Spouts toy, has been cleverly named after the famous nursery rhyme. During one of our play sessions I started singing the nursery rhyme and as I did I tried to push the ball back up one of the spouts.Evie grinned and instantly took over and role played the song with the Itsy Bitsy Spider ball. She made him climb up the pipe and then when he reached the top, she filled the rain cloud with water. She then used the rain cloud to pour water down the pipes so that it would push the 'Itsy Bitsy' spider ball back out again. Then she picked up the sun cup to 'dry up all the rain' and pushed the spider ball all the way back up to the top again.For smaller children, singing the nursery rhyme will help to encourage their listening skills and language development. It's also such a fun way of learning with this toy.Once you've finished play time, the Bright Basics™ Slide & Splash Spouts can be tidied away into a mesh bag which comes in to the box. This can then be hung to dry when it's not in use. Bright Basics™ Bath BlocksThe second bath toy I’m going to share with you is the Bright Basics™ Bath Blocks. These are also suitable for ages 2 - 5 and again there are so many learning points for little minds. The Bright Basics™ Bath Blocks come with:Build It!The Bright Basics™ Bath Blocks comes with a large floating base and lots of bricks and accessories that can be stacked and built on top the floating the base. The idea is to make a giant floating sandcastle.For early learners and younger children, they can start off playing with this through balancing and stacking. Why not build a huge tower with the bricks so that your child can see what happens? Then you can knock it down so that your child learns cause and effect, before you build it back up again. This will help them to develop sensory awareness and fine motor skills as they try and balance the blocks on top of one another.As Evie is a little bit older, for her it was all about working out where the different parts could go, so that she could complete the sandcastle.Imaginative Play!The bath blocks also come with four sea creatures; a seal, a whale, a dolphin and a turtle. As soon as Evie finished building the castle, the imaginative play began and for the past few bath sessions Evie has been turning the castle into a home for the four sea creatures, who she makes interact with each other. I also used this toy to introduce Evie to a new nursery rhyme that we haven’t sung to her before.Sing It!One thing I love, is that Bright Basics™ team include an activity guide in each toy pack, so that you get inspiration of things you can do with your child. One thing they encourage with each toy is learning through singing.Singing helps with listening skills and the repetition in songs such as 'nursery rhymes', really helps to support early language development. The song they recommend singing for this toy is the “She Sells Seashells by the Seashore” nursery rhyme. After I sang this song to Evie, she was inspired to turn the castle into a ‘shell shop’, where the creatures would come in to buy shells from the turtle who was chief shell collector. She would re-sing the song as each animal swam around the bath and up to the front door of the castle. Bright Basics™ 123 TubbiesThe final toy we were sent to review is called the Bright Basics™ 123 Tubbies. This bath toy is suitable for ages 3 - 5 and is a great bath toy for introducing shapes and numbers to small children. The Bright Basics™ 123 Tubbies comes with 26 individual puzzles.Build it!The second way you can play with this toy is by building with it. Using the shape pieces and the construction pieces, your child can you put together a building on your bathtub wall. This gave me the opportunity to discuss shapes a lot more with Evie as she built different structures on our the wall of our bath.Every time she picked up a piece to add to her building, I asked her to tell me what makes each shape unique. For example; a square has four sides the same. I then encouraged her to discuss the difference between a square and rectangle. I loved hearing her thoughts on this.If your child is a bit younger than Evie though, they can simply play with this toy by building different structures, which will help them to develop fine motor skills. You can then use this opportunity to help you to teach your child the name of shapes and to encourage shape recognition.Sing It!The final way we loved playing with this toy is by singing yet another new nursery rhyme. Singing is particularly good, especially for younger kids. This time the Bright Basics™ team encourage you to sing the 'One, Two, Buckle My Shoe' song. Singing this song helps to reinforce patterns and number recognition and generally makes play time with this bath toy a lot more fun. Our ThoughtsThank you so much to Learning Resources for sending us these three bath toys to review. My favourite thing about all three of these toys is that they all combine both learning and bath time fun. Evie didn’t feel like she was in a strict learning environment, yet at the same time, each time she plays with even one of these toys, she is learning life skills and is being encouraged to hit new milestones, which is fantastic preparation for school and beyond.We can't even pick a favourite out of all three of these bath time toys. All three of them are so unique, fun and educational and we will definitely be continuing to have fun with them over the next year and beyond.To hear more from Life Unexpected, go to www.lifeunexpected.co.uk
READ MORE